Saturday, August 31, 2013

Dry, Dusty, and Crunchy Land

Texas Garter Snake
Last weekend I invited a coworker and her son to visit Die Weide as they've been reading my blog and looking to purchase their own piece of Texas paradise. While walking the back trail, her son, Wes, spotted this snake, subsequently identified as a Texas Garter Snake. He, at eight years old, had no fear of snakes and wanted to pick it up. We didn't let him, but he did touch it. It was more than 2 ft long.

Funny thing about that is in the several years we've owned Die Gruene Weide, we've only seen three snakes, and I never spotted one. Inge spotted a corn snake in the copse of trees near Picnic Pecan, and she spotted the water moccasin in the creek below the pond. (During one of the few times the pond held water.) And now a complete stranger to the land spots the garter snake. I guess I'm just snake blind.

This weekend I went out to water the orchard, feed and water Herbie,  the donkey, and move the trail cam elsewhere. I had placed the trail cam in the orchard to see what was eating our peach trees and found out it wasn't Herbie as I suspected, it was a doe and her fawns that decimated our orchard. The deer denuded two of the six peach trees and seriously damaged a plum tree. In the garden the asparagus  had been browsed down to stubby stalks - all the former delicate green and lush asparagus vegetation gone! Hopefully they grew enough through the summer to regenerate next spring.

The one sad thing I found today was that the land was very dry, dusty, and crunchy. This years long drought is taking a toll on the land and it doesn't take long for the Blackland Prarie to exhibit the cracks and movement of the predominately clay soil drying up. The vegetation withers, curls, and browns and crunches underfoot. When the land looks like this I have much less enthusiasm to write because I am so saddened to see how unhealthy it looks in drought conditions.

When the land looks like this I dream of living in a place like Washington State, or Oregon, or Kentucky, or North Carolina. Some place where the land looks lush and green from spring to fall and a garden grows with only modest additional watering requirements. I could, even now, transfer to North Carolina with my job, but we've put so much work into Die Weide, that it would be a shame to loose out on the orchard of 11 trees we planted and the garden and so on. So I dream of green while suffering and lamenting over the drought that I seriously worry may be a persistent and permanent new feature as a result of global warming. I would be seriously sad if this dry summer condition becomes the forevermore norm because from a gardening perspective, there's not much productive that comes from land in this desiccated condition.

Sunday, August 25, 2013

My Own German Sourdough Roggenmischbrot Recipe and Baking Instructions

Roggenmischbrot Ingredients Staged
Today I set out to bake my German Rye Sourdough mixed Rye Bread. (Echtes Deutches Roggen Mischbrot aus Sauerteig) I really love eating the fine bakery breads in Germany, but found all pretenses at German bread in U.S.A. to be pale comparisons to the real thing. Being an enterprising sort not willing to give up on eating such a wonderful treat, I set out to teach myself how to bake a loaf of Roggenmischbrot that would do Germany proud.

I started out baking bread from five different Mischbrot recipies found online, each of which lacked the flavor or consistency of what I remembered. But the fifth loaf came close, so I decided to modify the last recipe myself based on previous baking experiences. Two attempts later, I found the recipe and baking process that delivered a wonderful crunchy crust genuine German loaf of sourdough bread.  Two years later this recipe consistently bakes a perfect pair of bread loaves every time. (I'll put the sourdough starter instructions at the bottom of the blog page.)

The recipe (with pictures of today's baking effort below):

530 g sourdough starter and yeast starter additive
   Yeast additive (mix next three ingredients and let rise - optional)
   1/2 C General Purpose flour
   1 Package Rapid Rise Yeast
    1/2 C lukewarm water
    Rye Sourdough starter (enough mixed with above yeast mixture to make 530 g)
300 g Rye flour
800 g Bread flour
30 g salt
600 ml water (just over 2 cups.)

Proof the sponge (add 1 C water and 1 C rye flour to sourdough starter in bowl and let stand/feed overnight)
(optional) Mix Yeast additive ingredients in small bowl and let rise about 15 minutes.
Meanwhile, measure out dry ingredients in large bowl and mix. Add the 530 g yeast/sourdough mixture. Start adding and mixing in the water until a well mixed sticky ball produced. Roll sticky ball out onto dry clean counter and knead 12 minutes, without adding extra flour. Rye dough must be stickier than white bread dough or the bread will come out dry and crumbly.

Put kneaded dough ball in large bowl, cover with clean kitchen towel and let rise for 1 hour to about doubled. Punch down, lightly knead and pinch into two loafs. Knead each loaf about 20 strokes and form into desired shape. Lightly sprinkle cornmeal on shallow baking pan (I use steel cookie sheet). Place loaves on pan, cover with towel and let rise for about 1 hour. (Slightly longer in winter than summer.)

Preheat oven well ahead of time to 475 degrees F. I preheat the oven with an Iron griddle on the bottom shelf, with the bread rack one level above. After the bread has risen, cut three slits into each loaf using a razor blade. Put the bread in the oven, and immediately pour 1/3 C water on the griddle to generate a cloud of steam - that's the secret to a crunchy crust. Bake the bread 10 minutes at 475 then lower the temperature to 400 degrees F and bake 50 minutes more. (Keep an eye out though, baking time is a bit shorter in the Summer.) 

Remove from oven and place loaves on cooling rack. It's best to let it cool down a good bit, but I admit to slicing it while too hot and enjoying it right away.
Sourdough and Yeast Added to Flours and Salt
 Note - The optional yeast additive helps speed up the dough rising. If you want, just use the sourdough starter, but the dough rise times need to be extended. (Rule of thumb: double dough first rising, then allow loaves get to "loaf size" on second rising.)
Sticky Dough Ball Rolled onto counter and ready to knead

Really Sticky! (Notice wedding band on counter at top
I've kneaded that into my dough before!)

After 12 Minutes of Kneading. Dough ring, but no extra flour used.
It's a bit tacky to the touch.

Leftover Rye Sourdough Starter poured into jar ready for next loaf

Dough Has Risen!

Punched down, divided, lightly kneaded and loaves formed.

Risen to bread size and slicing top with razor.
Notice Iron Griddle for temp control and steam generation.

Sliced while still steaming hot! Crunchy Crust Yumminess!
Rye Sourdough Starter
In suitable starter crock or jar (see picture above) mix one cup rye flour and one cup water and leave in warm place in kitchen. Every day for five days, pour off a small amount of starter and mix in 1/2 C rye flour and 1/2 C water. By 5th day, the starter should smell yeasty and bubble lightly. It's ready!

Long term care: Place starter in refrigerator and once a week, pour off small amount and mix in 1/2 C rye flour and 1/2 C water.

To use - "proof the sponge" the night before baking bread. Remove starter from refrigerator, pour into medium sized bowl, and add/mix-in 1 C rye flour and 1 C water. Let stand overnight and by morning a bubbly yeast infested bowl of goo will be ready to use to bake bread as described above. If you use the yeast additive, there will be enough starter left over to put back in the jar and into the refrigerator for the next loaf.

Sunday, August 18, 2013

Well Slab, Arrowhead Hunting, and Gardening on the Home Front

Floating in the Slab 
Saturday morning we framed, dug in, and leveled a 4 ft x4 ft frame for the concrete slab around the well casing. Then we mixed several bags of quickcrete and poured the slab. This was the first slab I've poured so I naturally scratched my initials and the year after it dried some. Who knows who will see JEG in the slab some day far in the future and wonder who that was. A hand pump will arrive in the next week or two and I watched a video to see that it's easy enough to install. It's convertible to 12Volt motorized for when I set up automated water control systems I have in mind. I'll, of course, post a few pictures when we install it. I calculated a rough recharge rate of 5 gallons per minute based on the 8 gallons per minute pump-out rate and how long it took to empty the well.

I dropped my cork and string down the well and measured the static level at 15 ft, 6 inches which is a six foot gain over last week's measurement of 21 ft 8 inches. I attribute the water gain to the rain we got last week. While at work I saw dark clouds in the right direction so I pulled up KXAN radar to see a storm passing over the land.  It's hit or miss if radar actually pans out to rain on the ground, but our garden gage showed 9/10th inch of rain from the storm and the rain appears to percolate surprisingly well through this blackland clay soil to raise the static water table. Our water harvest tank was just 30 gallons shy of full too so there may have been more than an inch of rain given the tank was down to about 100 gallons last week.
Wheelbarrow full of Arrowhead Hunting Gear 
 After pouring concrete and eating sandwiches for lunch we quickly knocked together a sifting screen from 2x4's and hardware cloth and loaded the wheelbarrow with it along with shovels and water to try our hand at arrowhead hunting. Kenny and I have talked about hunting for arrowheads but never taken the time to gear up and seriously search for artifacts until now. With the well drilled we'll have more recreation time. Well drilling turned out to be full time work with little time for fun except for toasting exceptional sunsets with a few beers on our campouts.

I wheeled our gear across the pasture to the north fence path expecting easy going but found the wind storm our neighbors told us of two weeks ago had knocked two trees down across the fence and path. I'll need to fire up the chain saw to clear the path again. Fortunately, the donkey blazed a new path around the obstruction.
Apparent Tool 
We decided to start digging about 10 ft inside the north fence in the creek bed. First we cleared bigger rocks from the dig site and one rock kenny tossed caught my eye as it rolled over the growing pile of rocks. I snagged it and found the above rock that fits sweetly in the fist with a perfect thumb sized notch at the top and the rounded tip protruding below the fist. It is too perfect a fit and function not to be a tool someone created from an excellent stone find. Even without the notch it feels very nice in the hand, but the notch placement can't be an accident!
Kenny Digging at First Creek Bed Site
We dug about 18 inches deep or so and sifted a lot of rocks over about 16 sq ft. We found a a lot of flint chunks and chips but we didn't encounter an arrowhead. I started loading my pockets with pretty colorful rocks found in the sifter. I plan to clean the rocks and get a nice looking shallow bowl to show them in. After about two hours of digging at the first location we moved up-creek and dug under a wash-out around a sharp bend, then we dug in the pile of rocks that gathered just past the washout. Still no arrowheads.
Pocket Full Of Rocks - Cleaned Up for Display. See if you can spot the three petrified wood rocks.
I remember my paternal grandparents used to dig and sift creek beds around Sweetwater, Texas for arrowheads and they had a huge collection of the points as a result. They displayed their harvest in wood cases with glass fronts that contained everything from tiny bird points to huge axe heads. I know this area should have a few but I don't know how many yards one has to dig per arrowhead. However, being an optimist, I expect to find a point with every shovel full of dirt! Y'all will hear me hooting all the way to Austin the day I find a genuine arrowhead on Die Manchmal Gruene Weide!

Sunday morning I replaced the seriously dinged mower blade and mowed. It was so pleasant for a August weekend that I decided to harvest the compost heaps and spread the resulting fertile detritus on our raised beds. Then I tackled the task of harvesting the worm compost bins as well which also augmented raised bed soil as well as the grape vine and the lemon and grapefruit trees in planters. 

Sunday, August 11, 2013

Bee Relocating, Packing Sand, Casing Video - Another Weide Day

Relocated to Shadier Spot
 The Bee Hive showed signs of heat distress last week so we set up the shade umbrella last week only to find a strong wind gust blew it right past (but not on!) the bee hive. (The rain gust was accompanied with 1/2 inch of much needed rain too!) So we decided that the bee hive needed a new shadier home.

After scouting out several locations we spotted this copse of trees with a lot more shade. The previous location received full summer sun from around 09:30 until around 16:40. This location will only receive full sun from around 11:00 until 14:30. The bees returning to the old hive location buzzed frantically around, lost at first, but as we checked back every two hours fewer bees buzzed the old location and they seemed to be settled around the new location. Below you'll find a peek at the hive. There's a new comb growing but I would have expected more combs by now. There are 8 or 9 combs now. We're not planning to harvest honey in this, their first year. We will let them overwinter in peace on their full reserves and see if the hive grows harvestable honey combs next year.

View Port Bee Action
For your entertainment, I have posted the video promised last week of my brother and I casing the well in. It wasn't hard at all. Today, we measured the well and found the static water level at 21 ft, 8 in. Given the neighbors all reported wells at around 19 ft static level, and given our continuing drought, I'm happy to see the static level within a foot or so of the neighbor's wells.
I've been looking at what pump to install and I'm leaning towards, Simple Pump. Their pump is a hand pump that with a quick 10 minute change can be converted to run with a motor. (at a cost of course). In addition, it is capable of pumping into a pressurized tank as well.

My plan is to install the large 1750 gallon water harvest tank this fall. All garden and orchard irrigation and donkey watering will be done through the water tank. After the initial rain fill, I'll maintain a level of 1/3 a tank with the well pump with a level pump switch. When it rains and fills the tank above the 1/3 level, pump won't be needed. I will also put in a fail safe - if the tank falls below 1/4 full, I'll shut off the pump in case there's a leak - it's not good to pump the well dry because it can damage the pump.

I'll video the pump installation process after I get the pump in a few weeks. I sure hope we don't need to tote water from the city any more!


Sunday, August 4, 2013

Well begun, Well Ended

New Folding Table by the Fire Pit
 To tie into Thursday's blog, I start with this photo of the folding table in its new place of honor next to the fire pit. And since we started here we'll just continue with the campout dinner of the night - a sunset German treat! Bratwurst, Sauerkraut (twice cooked which enhances the flavor), Bavarian Rye bread, and course washed down with good beer. Wunderbar!
Sunset over Fire Pit

A German Feast - Bratwurst, Sauerkraut, Bavarian Rye Brot, und Bier!
But I digress - the reason for the campout was of course, to complete the well this weekend. We started by drilling all day Saturday - we paid for the compressor so might as well get another day in. After drilling my informal measurements said we were around 56 feet deep. We decided to attach the original vacuum to the return line and empty the well out Saturday evening and see how much water stood by Sunday morning.

I used our 35 gallon trash barrel to measure how fast the water was being pumped out with the vacuum and found we removed water at the rate of 8 gallons per minute. We pulled a lot of water out of the hole but never vacuumed all the water out. The level was pulled down a very long way - a bright flashlight could reflect off the water a long way down.

Sunday morning I used a string and a float to measure the water surface depth. By inspection, I could definitely see the water was higher than where we had pumped it out the previous evening. With my string & bobber, I measured a depth of 31 ft. That means overnight we recovered 20 feet of water.

I can't wait to measure the well next weekend!

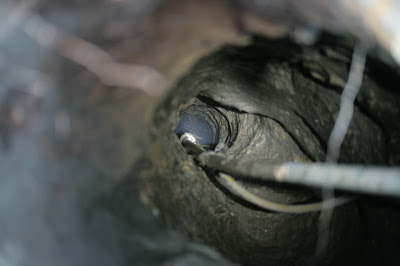
Photo down the hole as we vacuum the silty water out.
I made a video of Kenny, Inge, and I installing the casing. I will need to edit the video for length before  I post it on youtube and here. Below Kenny and I pose over the installed casing. We poured 12 bags of fine pebbles around the casing. I measured the results and found that at 24 foot depth, that we needed another 4 to 6 bags to get above the water intake slits. I'll do that next weekend and on top of the pebbles place sand, then fill in the rest of the hole with the well tailings. After that we'll frame in a concrete form for the well pad where the well house will be built.
Well Casing and Construction Crew
We stretched out the vacuum system which I bottomed out in the well and marked for the official depth measurement. Kenny is holding the tape at the mark below to give you a perspective of how deep this well was drilled and the next photo shows the depth of 54 foot.


By the close of day Sunday, we put away all the compressor hose and broke up and put away the tailing return 1" PVC pipe. The system is perfectly ready to use again another day for another well.

Thursday, August 1, 2013

Less Than 2 Hour Folding Table for Weide

Folding Table - Timestamp 8:30 p.m.
For the last few months I've mulled over a solution for a simple table to use on Die Gruene Weide - most especially for cooking around the firepit, but I also recognize that other locations like the bee hive would also be more easily workable with a simple table. Monday evening I saw youtube video with a perfect Weide table - a simple folding table of pine. I also recognized I could build it pretty quickly because the design was pretty straight forward.

So last night I bought the wood and tonight I built the table. I took pictures during the build and annotated the timestamps in the comments. From 6:11 p.m. to 8:24 - with a break to eat a delicious dinner of Jägerschnitzel und Bratkartoffeln in between. Perhaps an hour and a half from start to finish to build a portable, functional table for use on Die Manchmal Gruene Weide!


Pine Table Lumber - Timestamp 6:11 p.m.

Wood cut and drilled and assembly started (after dinner) timestamp 7:59 p.m.

Assembly Completed - timestamp 8:24 p.m.
 I could have assembled it much faster if I hadn't left my cordless drill/driver in the shed at Die Weide. I used my dremel tool with a drill bit to pre-drill the screw holes, then I had to tediously hand screw the table together. Nice to know I still know how to use hand tools!
Table ready for use - timestamp 8:25 p.m.

Smiling Carpenter with table, timestamp 8:30 p.m.